How to Custom Point Your Domain to Blogspot (Blogger)
- 04/03/2010 6:39 PM
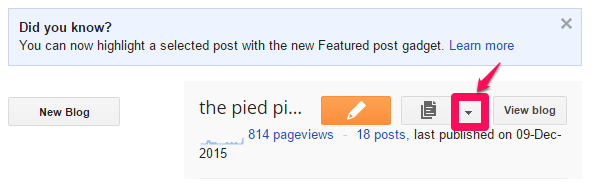
1) Login at www.blogger.com and select the blog that you wish to apply with the custom domain
2) Click on the drop down arrow and select "Settings" as seen below
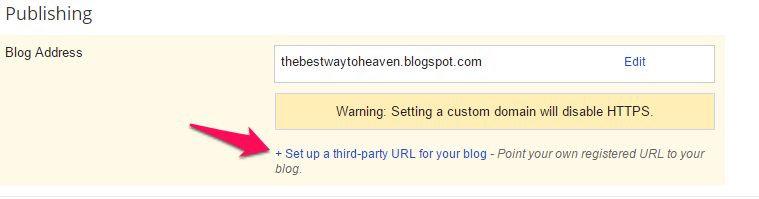
3) Under Publishing section, please click on "Set up a third-party URL for your blog" as seen on the image below
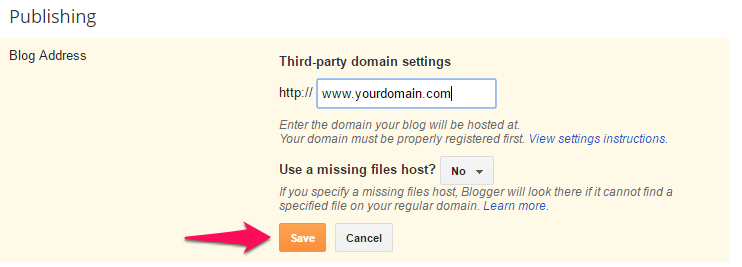
4) Now at the Advanced Settings section, type your new domain URL with "www" e.g.www.yourdomain.com . Click on Save.
5) After hitting the "Save" button, Blogger will display the following error message "We have not been able to verify your authority to this domain. Error 12".
Please copy the entire information as highlighted in the red box below inside a Notepad or MS Word document.

6) Please open a new web browser window and visit https://secure.web-hosting.net.my/clients/clientarea.php and enter your client area email address & password.
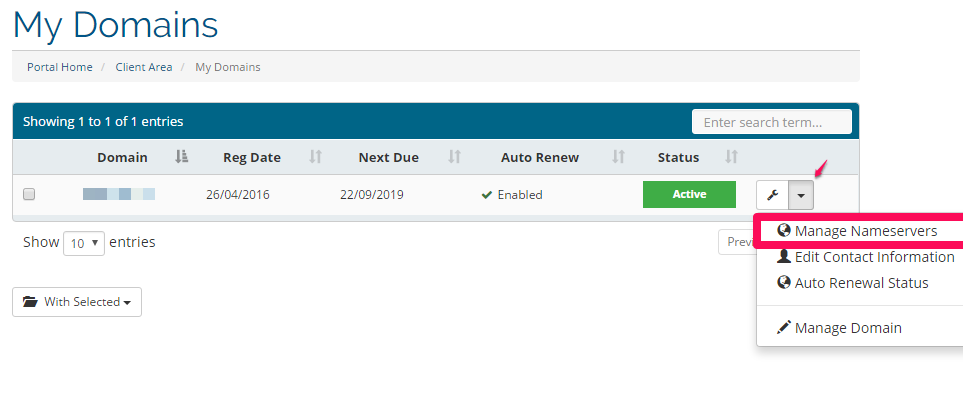
7) Under the "Domains" section please select "My Domains". Next, click on the drop down box next to "Manage Domain" and select "Manage Nameservers"
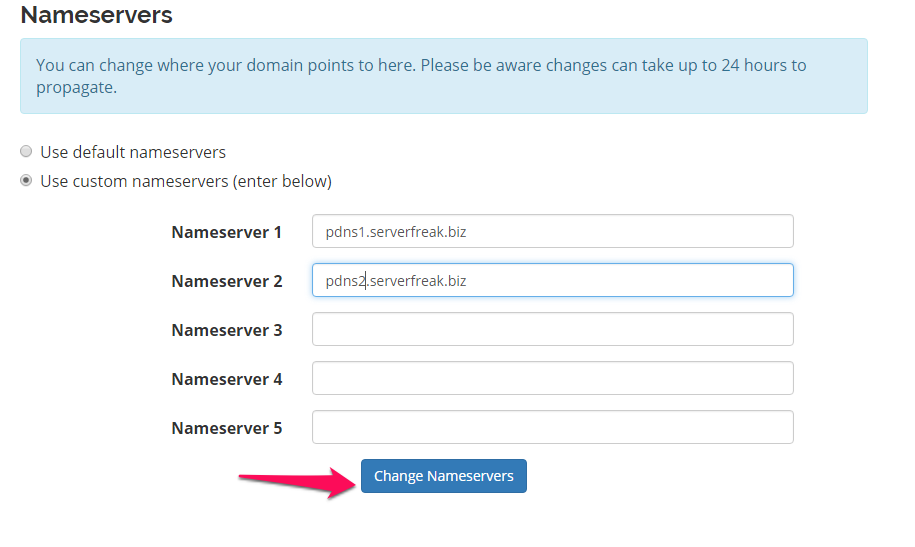
8) Click on the radio button "Use custom nameservers (enter below)" and enter the nameservers pdns1.serverfreak.biz andpdns2.serverfreak.biz as seen below. Press the "Change Nameservers" button to save the latest details.
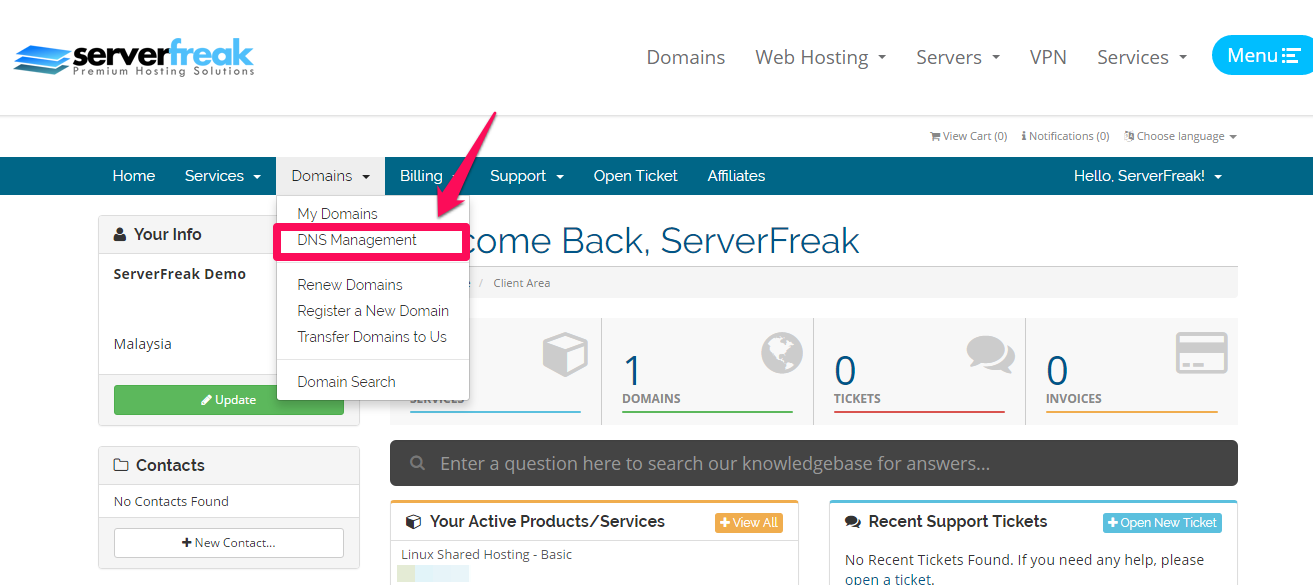
9) On the menu bar, please click on "Domains" -> "DNS Management".
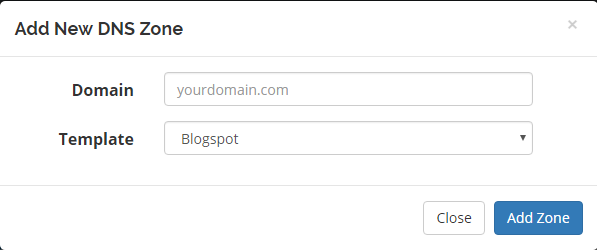
10) Click on the "Add Zone" button and enter your domain name (without www) at the Zone Press "Add Zone" button to save changes.
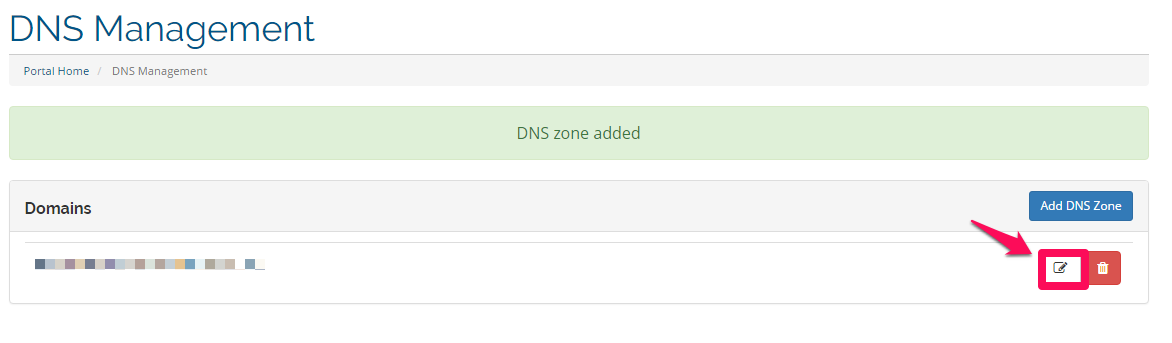
11) Your new domain name DNS Zone shall appear now. To insert the CNAME records obtained from Blogspot earlier, please click on the "Edit" button as seen below
12) You will see a page similar to this.Click on Add New Record.
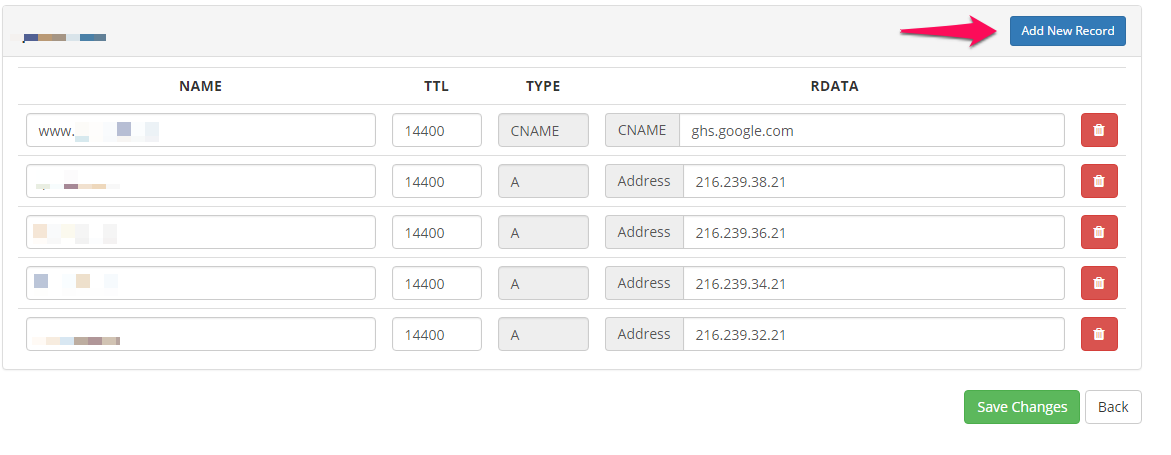
13)Scroll down to the bottom of the page and enter the CNAME records which you have saved in your notepad or Word document.
For example, here's a sample of my Blogspot CNAME record provided by Blogger.
|
Name, Label, or Host field |
Destination, Target, or Points To field |
|
www |
ghs.google.com |
|
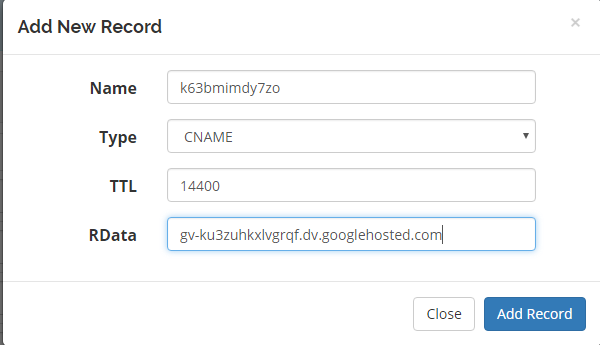
k63bmimdy7zo |
gv-ku3zuhkxlvgrqf.dv.googlehosted.com |
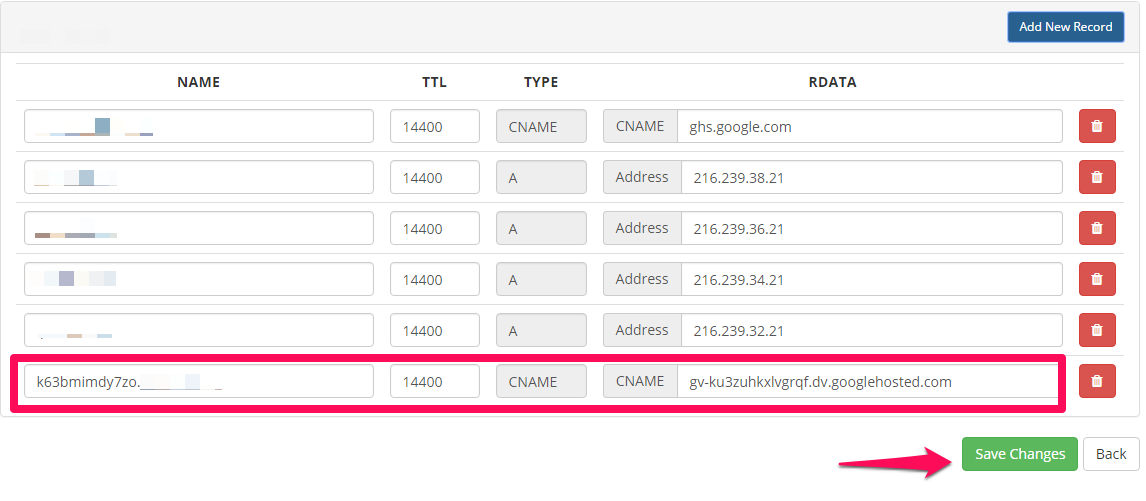
I shall enter k63bmimdy7zo on the "Name" column and gv-ku3zuhkxlvgrqf.dv.googlehosted.com on the "RDATA" column as shown below.
Click on Add Record.
15) After making the changes above, please allow at least 1 - 2 hours before performing the final steps below.
16) Go to "Settings > Basic > Publishing" inside your Blogger dashboard and select "Edit".
17) Enter your custom domain name e.g. www.yourdomain.com before hitting the "Save" button in order to confirm your new Bloggger address.
