How to Add Your Wordpress Site into Google Search Console (formerly Google Webmaster) Using Plugin
- 13/06/2018 10:32 AM
Note: You must have a Google Account in order to connect your site to Google Search Console (formerly Google Webmaster Tools).
You need to install Yoast SEO plugin into your WordPress site first before you can connect your website to Google Search Console.
Instructions on how to install the Yoast SEO plugin can be found here
1) Visit Google Search Console (formerly Google Webmaster Tool) using this link .
Sign into your Google account and click the red button to add your website.
2) Once you’ve clicked the button to add your site, just type your website’s URL in the box. Click the blue button to continue.
Please make sure you enter your complete url. For example, if your site is http://yourdomain.com it needs to be that exact url.
If your site uses WWW or is using the HTTPS it needs to include it. 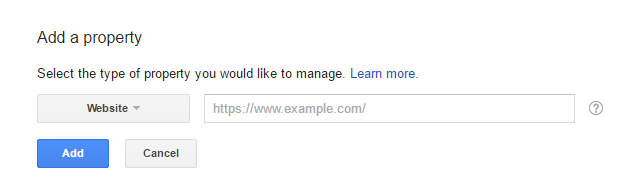
3) Copy the code for the HTML tag under the Alternate Methods tab.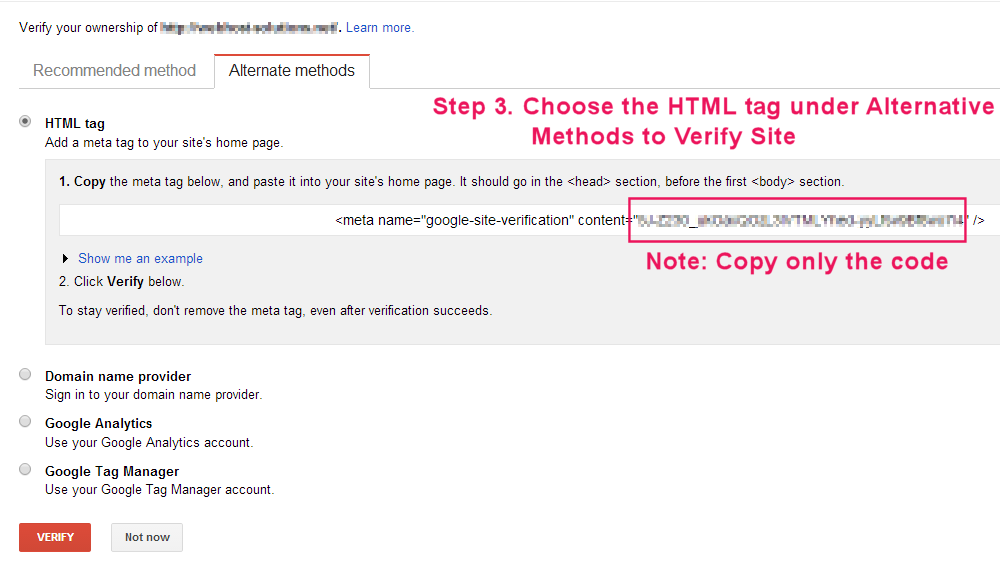
4) Log in to your WordPress website. When you’re logged in, you will be in your ‘Dashboard’.
On the left-hand side, you will see a menu. In that menu, click on ‘SEO’.
5) The ‘SEO’ settings will expand providing you additional options. Click on ‘General’.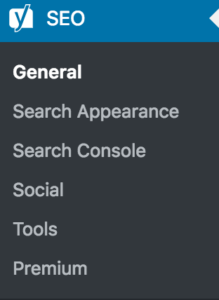
6) Click on the ‘Webmaster Tools’ tab and add the code under ‘Google Search Console’. Click ‘Save Changes’.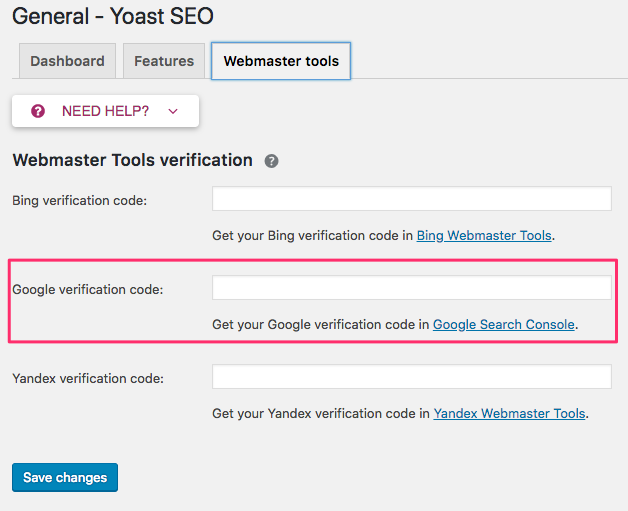
7) Switch back to Google Search Console (formerly Google Webmaster Tools) and click ‘Verify’. (See image in Step 3)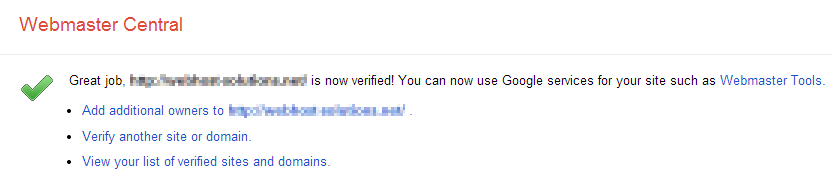
Congratulations! You’ve connected your website to Google Search Console (former Google Webmaster Tools)!
Now that you’ve verified and connected your website, you can submit your sitemap!
