Upload and Insert Image/Media Files into Blog Post
- 13/12/2013 12:18 PM
1) Login into your Wordpress
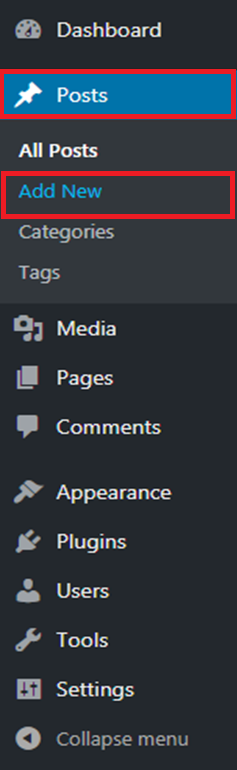
2) Start creating a new post by clicking on 'Post' and 'Add New' button to start creating a new post.
3) Click on the 'Add Media' button to add pictures into your post.

4) Click on 'Upload Files' tab to upload a new image file, or click on the 'Media Library' tab to choose image available from your media library of your Wordpress.

Media Library
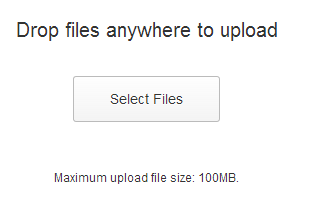
5) If you choose to upload a new image file, after clicking on 'Upload Files' tab as shown above, click on 'Select Files' to start choosing and uploading the image file from your computer
6) Select any image that you want to insert into your post by just click on it as shown in the example below.

7) At the right-hand side of the same page, you can fill in the details of the chosen image.

8) Once you've done with the above step, simply click on 'Insert into post' button to insert the image into your post.

9) Below is the example of how it will looks like once you've successfully insert the image into your post.

10) Click on 'Publish' button at the right-hand side of the same page, to publish your post into your website.

