Set up E-mail in Mozilla Thunderbird for PC using POP3 settings
Here's how to configure email account using POP3 in Thunderbird
Step 1 : Download and install Thunderbird in your computer. Thunderbird can be downloaded from below website :
>> https://www.mozilla.org/en-US/thunderbird/download
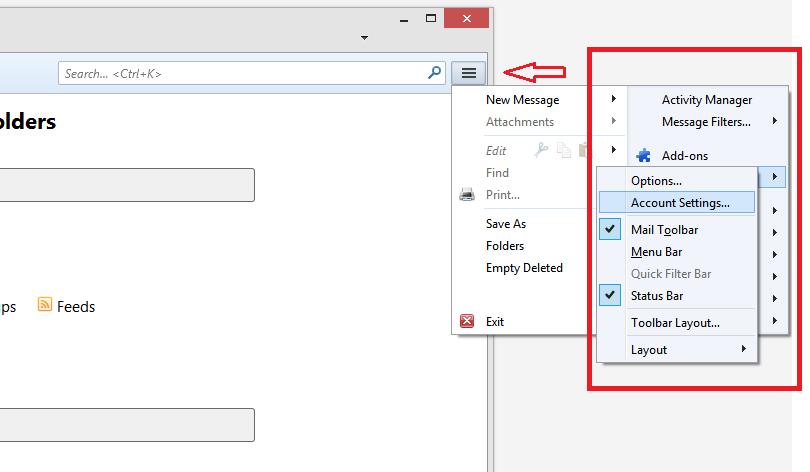
Step 2 : Click on the button shown in the image below, located on the top right of the Thunderbird, then click on "Options", then "Account Settings".
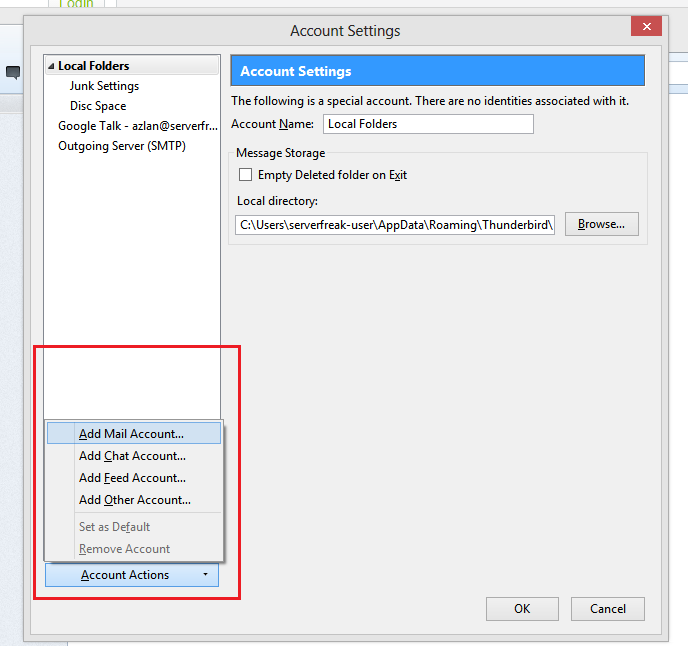
Step 3 : Click on "Account Actions" , then "Add Mail Account".
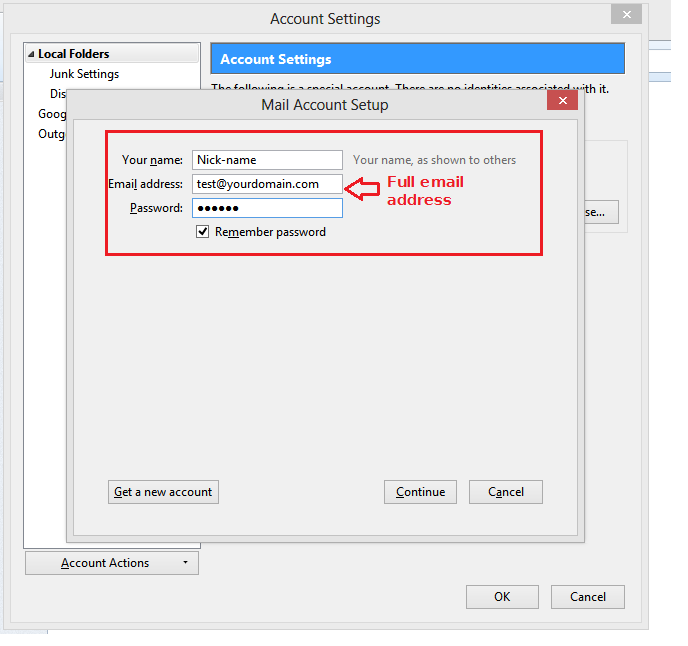
4. Enter your FULL email address and your email password as shown in the image below. Then click on the "Continue" button.
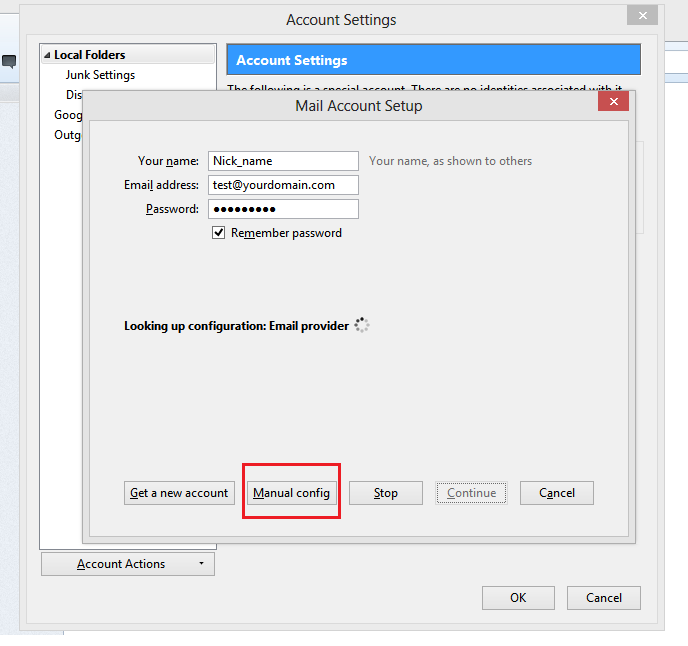
5. Below page will appear. Click on "Manual Config"
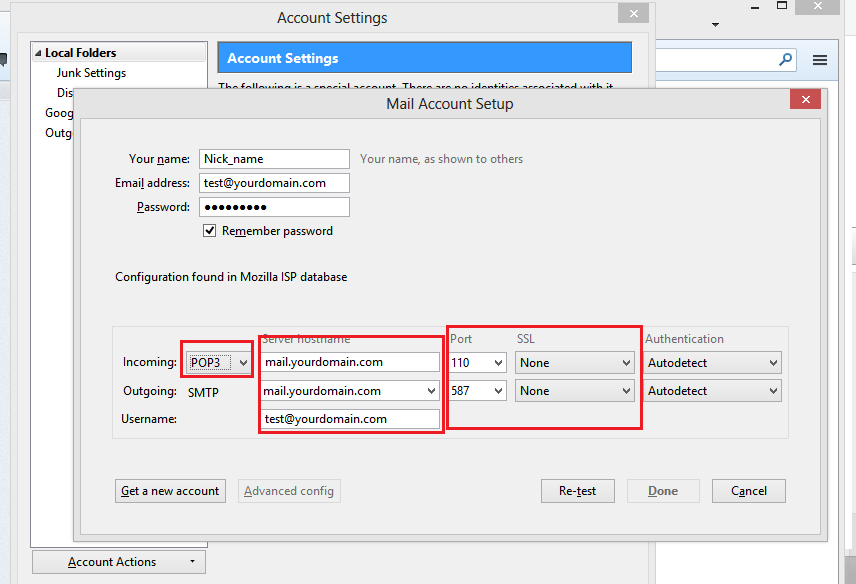
6. Select "POP3", replace "yourdomain.com" with your actual domain name. Deselect/disable all SLL options, and use the shown incoming and outgoing port numbers. 110 for incoming, for outgoing, use either 587 or 26. Once done, click "Re-test" or "Done".
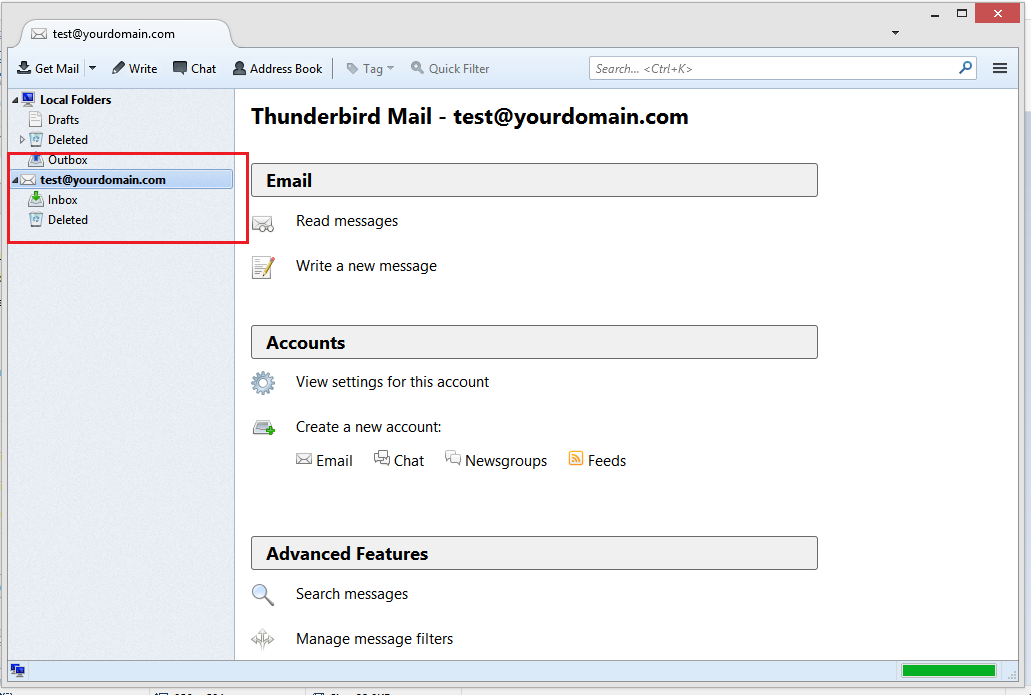
7. That's it! It's done. You've successfully configure your email account into Thunderbird!
Note : This tutorial is for POP3 email settings. For IMAP, change the protocol to IMAP and use incoming port number 143 instead of 110. Refer to step no. 6.
